My Brother printer does not print and has ink: how to fix it?

You are not alone, that your printer, whatever brand it is, has ink and does not print is a common failure. In this case we are going to focus on Brother printers, so before you start cursing read the article carefully and you will know how to deal with this annoying inconvenience keeping your patience. We're going to explain why this happens and what solutions you can put in place yourself to quickly solve the problem.
Reasons why your Brother printer does not print and has ink
An error in the cartridges, the heads clogged by dry ink, a very low level in your consumables, a bad connection between the computer and the printer, a damaged cable, a jam in the print queue..., there are many reasons why your Brother printer may stop printing or print poorly even though you have not jumped the ink out alarm. However, in this article we are going to focus on the most common reasons for this to happen.
Solutions if your Brother printer has ink and won't print
The first thing you should do is check that the connection between the computer and the printer is working correctly, make sure that you have chosen the correct port and make sure that there has not been a print queue jam. Once you have done this, if the printer still does not print, follow the following steps.
Reboot the computer
This is the oldest trick and the one that works best. Turn off the printer, disconnect the power cord and restart the computer.
Check the ink level of the cartridges
We can check the ink level of our cartridges Brother from the printer's control panel:
- Click on 'Menu'.
- Use the arrow keys or the keypad to select 'Ink' or Ink Management and press OK.
- Use the arrow keys again to select 'Ink Volume' and press OK.
If the ink levels are too low, this may be the problem.
Resetting the ink cartridges
Your cartridges may have ink but your printer may not recognize them as they are compatible cartridges. This too has a solution, so before you replace your cartridges with original ones, there is a little trick so you can continue to save with compatible consumables.
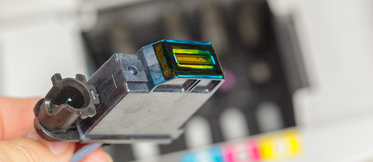
First check that the cartridges are correctly inserted and then examine the cartridge chip. If it is dirty, clean it with a cotton swab and a little alcohol, if it is incorrectly set, press it to reset it. Turn off and restart the printer now.
Check and clean the print heads
The first thing to do is to print a test page. How? For each model, the way to do this may vary slightly. However, the most common way is as follows:
- Turn off the printer and make sure that the front cover is securely closed and the power cord plugged in.
- Press and hold the GO button until all the indicator lights are lit.
- Release the button and wait until the lights turn off again.
- It can also be done from the computer itself using the printer driver.
Once the test pattern is printed, check the print quality and if it is not optimal, clean the print heads. How? Follow these steps:
- If your printer has a touch screen, look for the INK button on the control panel and press it. Otherwise, click on the 'Menu' button, use the arrows to navigate up or down until you select 'Ink' and press the 'OK' button.
- Now, use the arrow navigators again to select 'Cleaning' and press 'OK'.
- Press the up or down navigator arrows to select 'Black', 'Color' or 'All' depending on what you want to clean and press 'OK'.
- You can also clean the print heads from the computer.
Once the cleaning is complete, print another test pattern to see if the problem has been resolved. Also remember that cleaning the printheads consumes ink. If the printheads are clogged you may need to run another cleaning cycle.
Complete cleaning of the Brother printer
As recommended by Brother support, if you clean the print heads several times and the printing does not improve, the special cleaning method should be tried. The first thing to keep in mind is that if we start the cleaning with little ink we can cause damage to the equipment. So we follow these steps:
- We check that the ink is at least at half capacity.
- We use the navigation dates to press the button with the ink icon.
- Again with the arrow keys select 'Print head cleaning' and press 'OK'.
- Now press 'Settings' and 'OK' simultaneously' and the unit will start cleaning.


